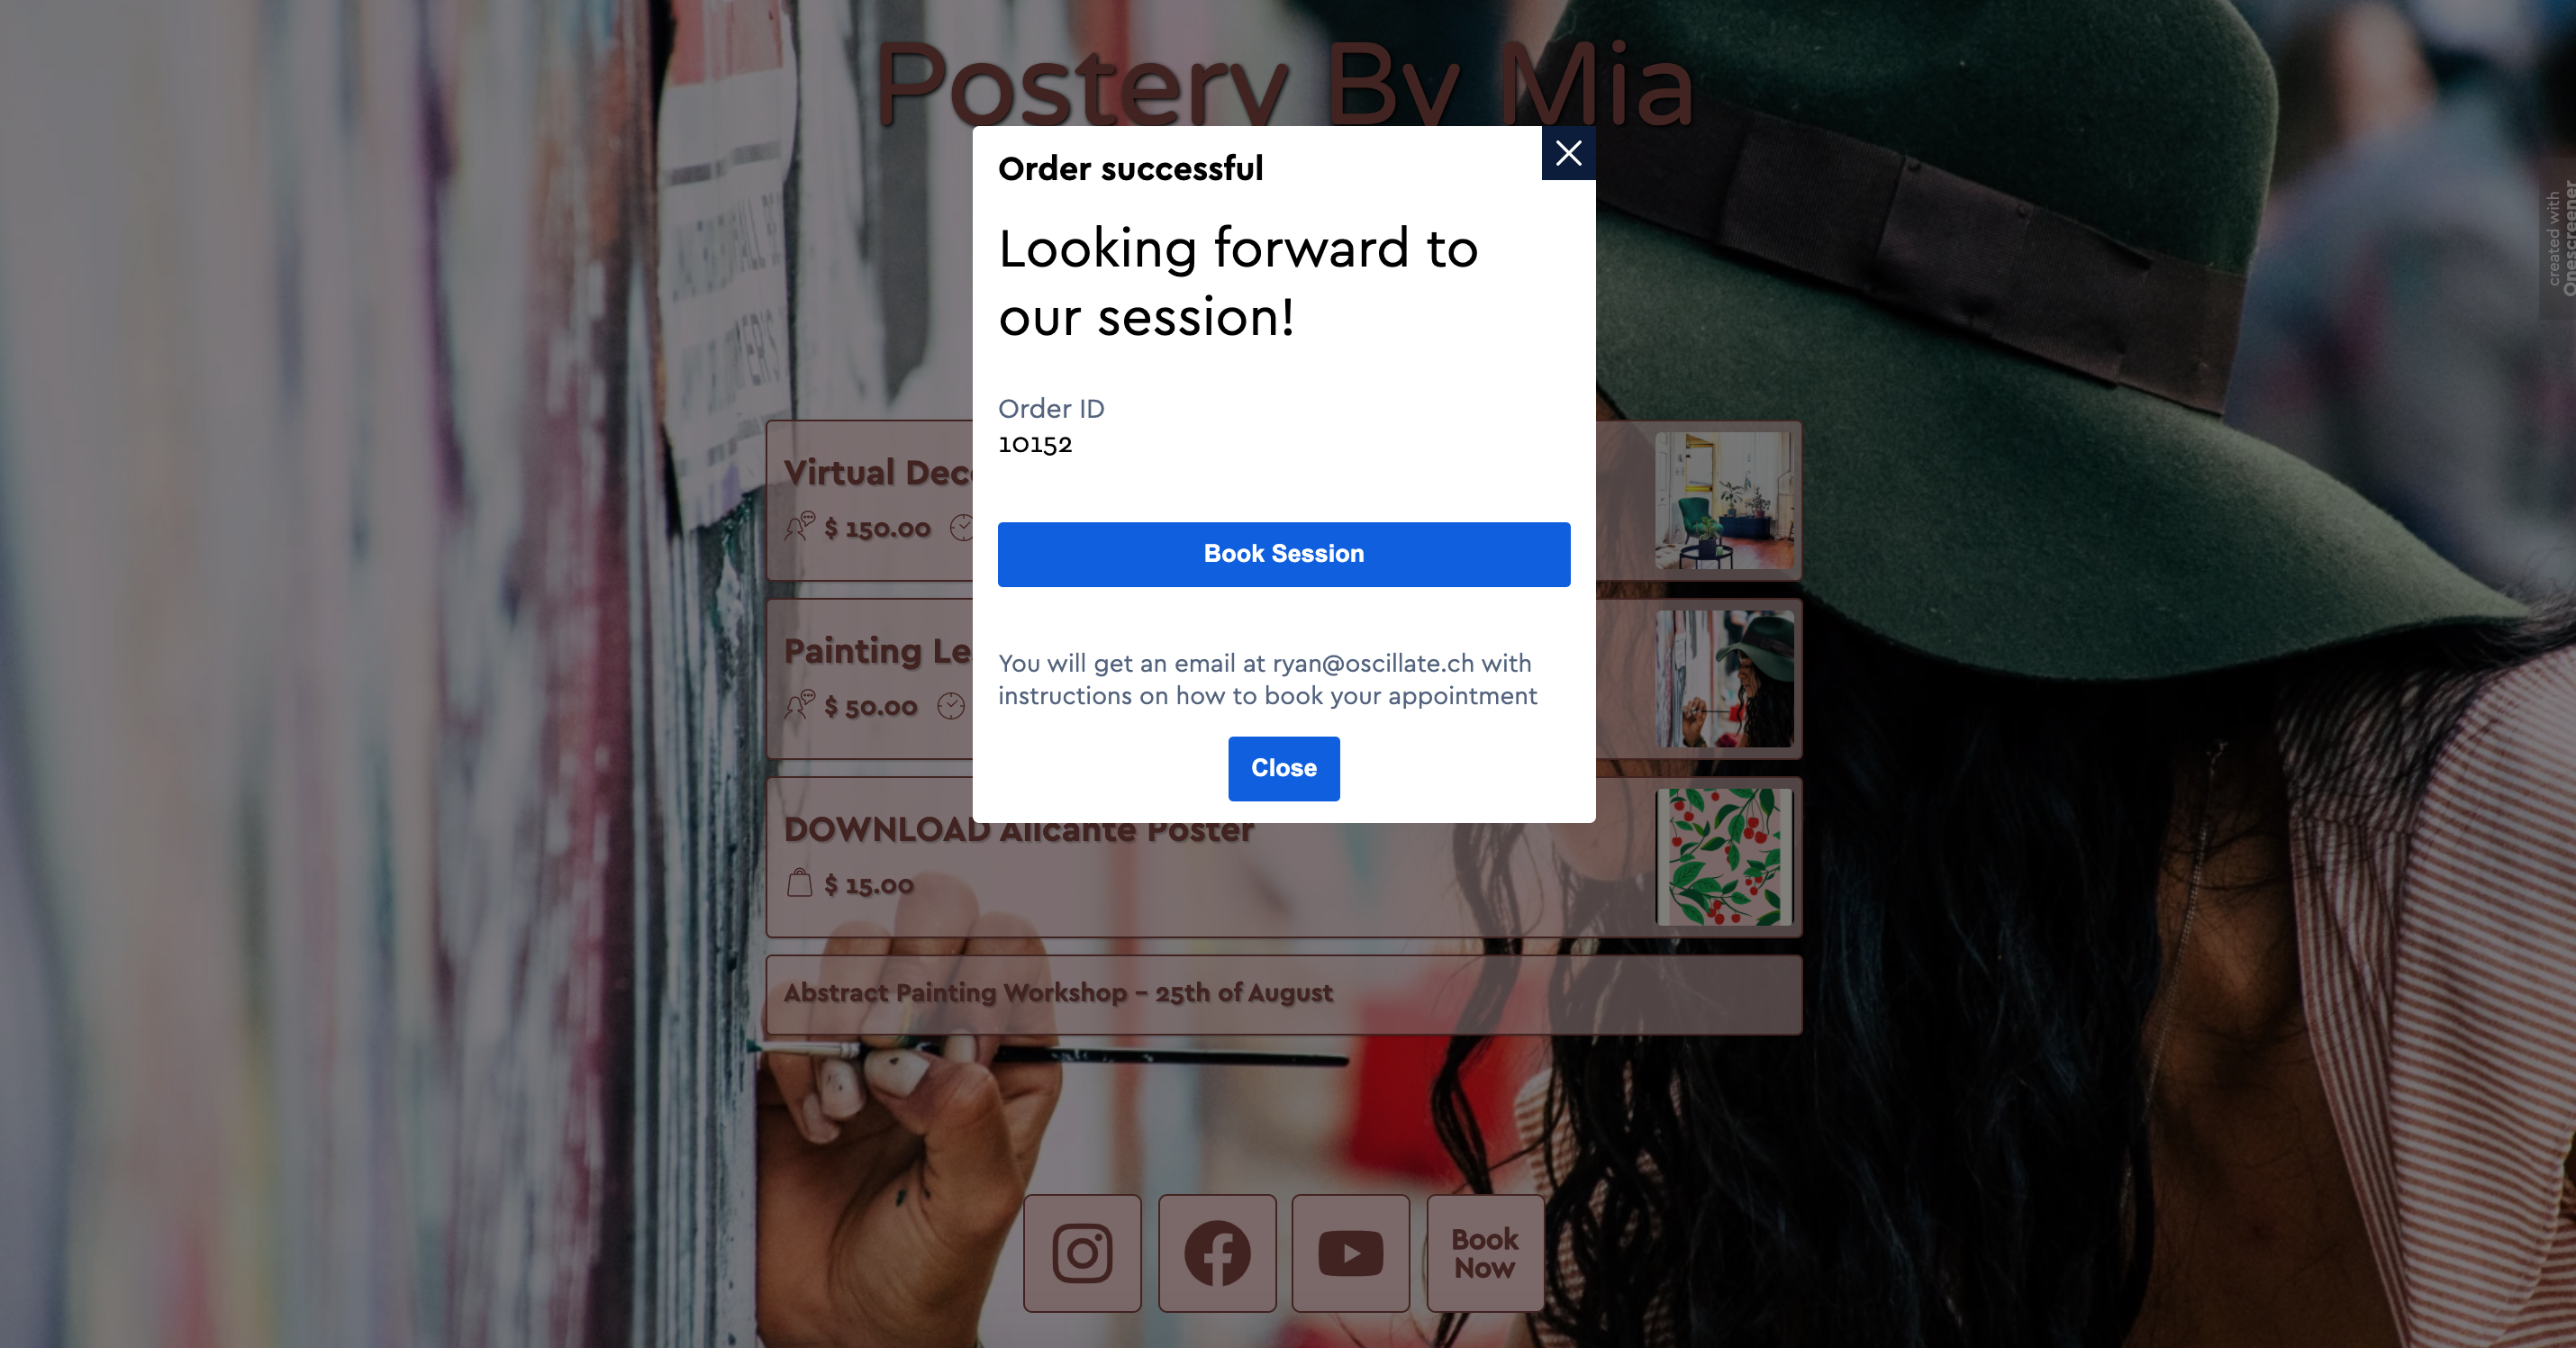
* For details on how to Sell a Session from your Onescreener, visit this FAQ.
When you add a Sell a Session e-commerce link to your Onescreener site, you must define how you would like your customers to book their appointment.
You can choose EMAIL (they are directed to your email address upon paying for the session) or CALENDLY as your booking method.

If you choose Calendly, you must enter your Calendly token (a number which identifies your account) and Onescreener will automatically verify the connection.

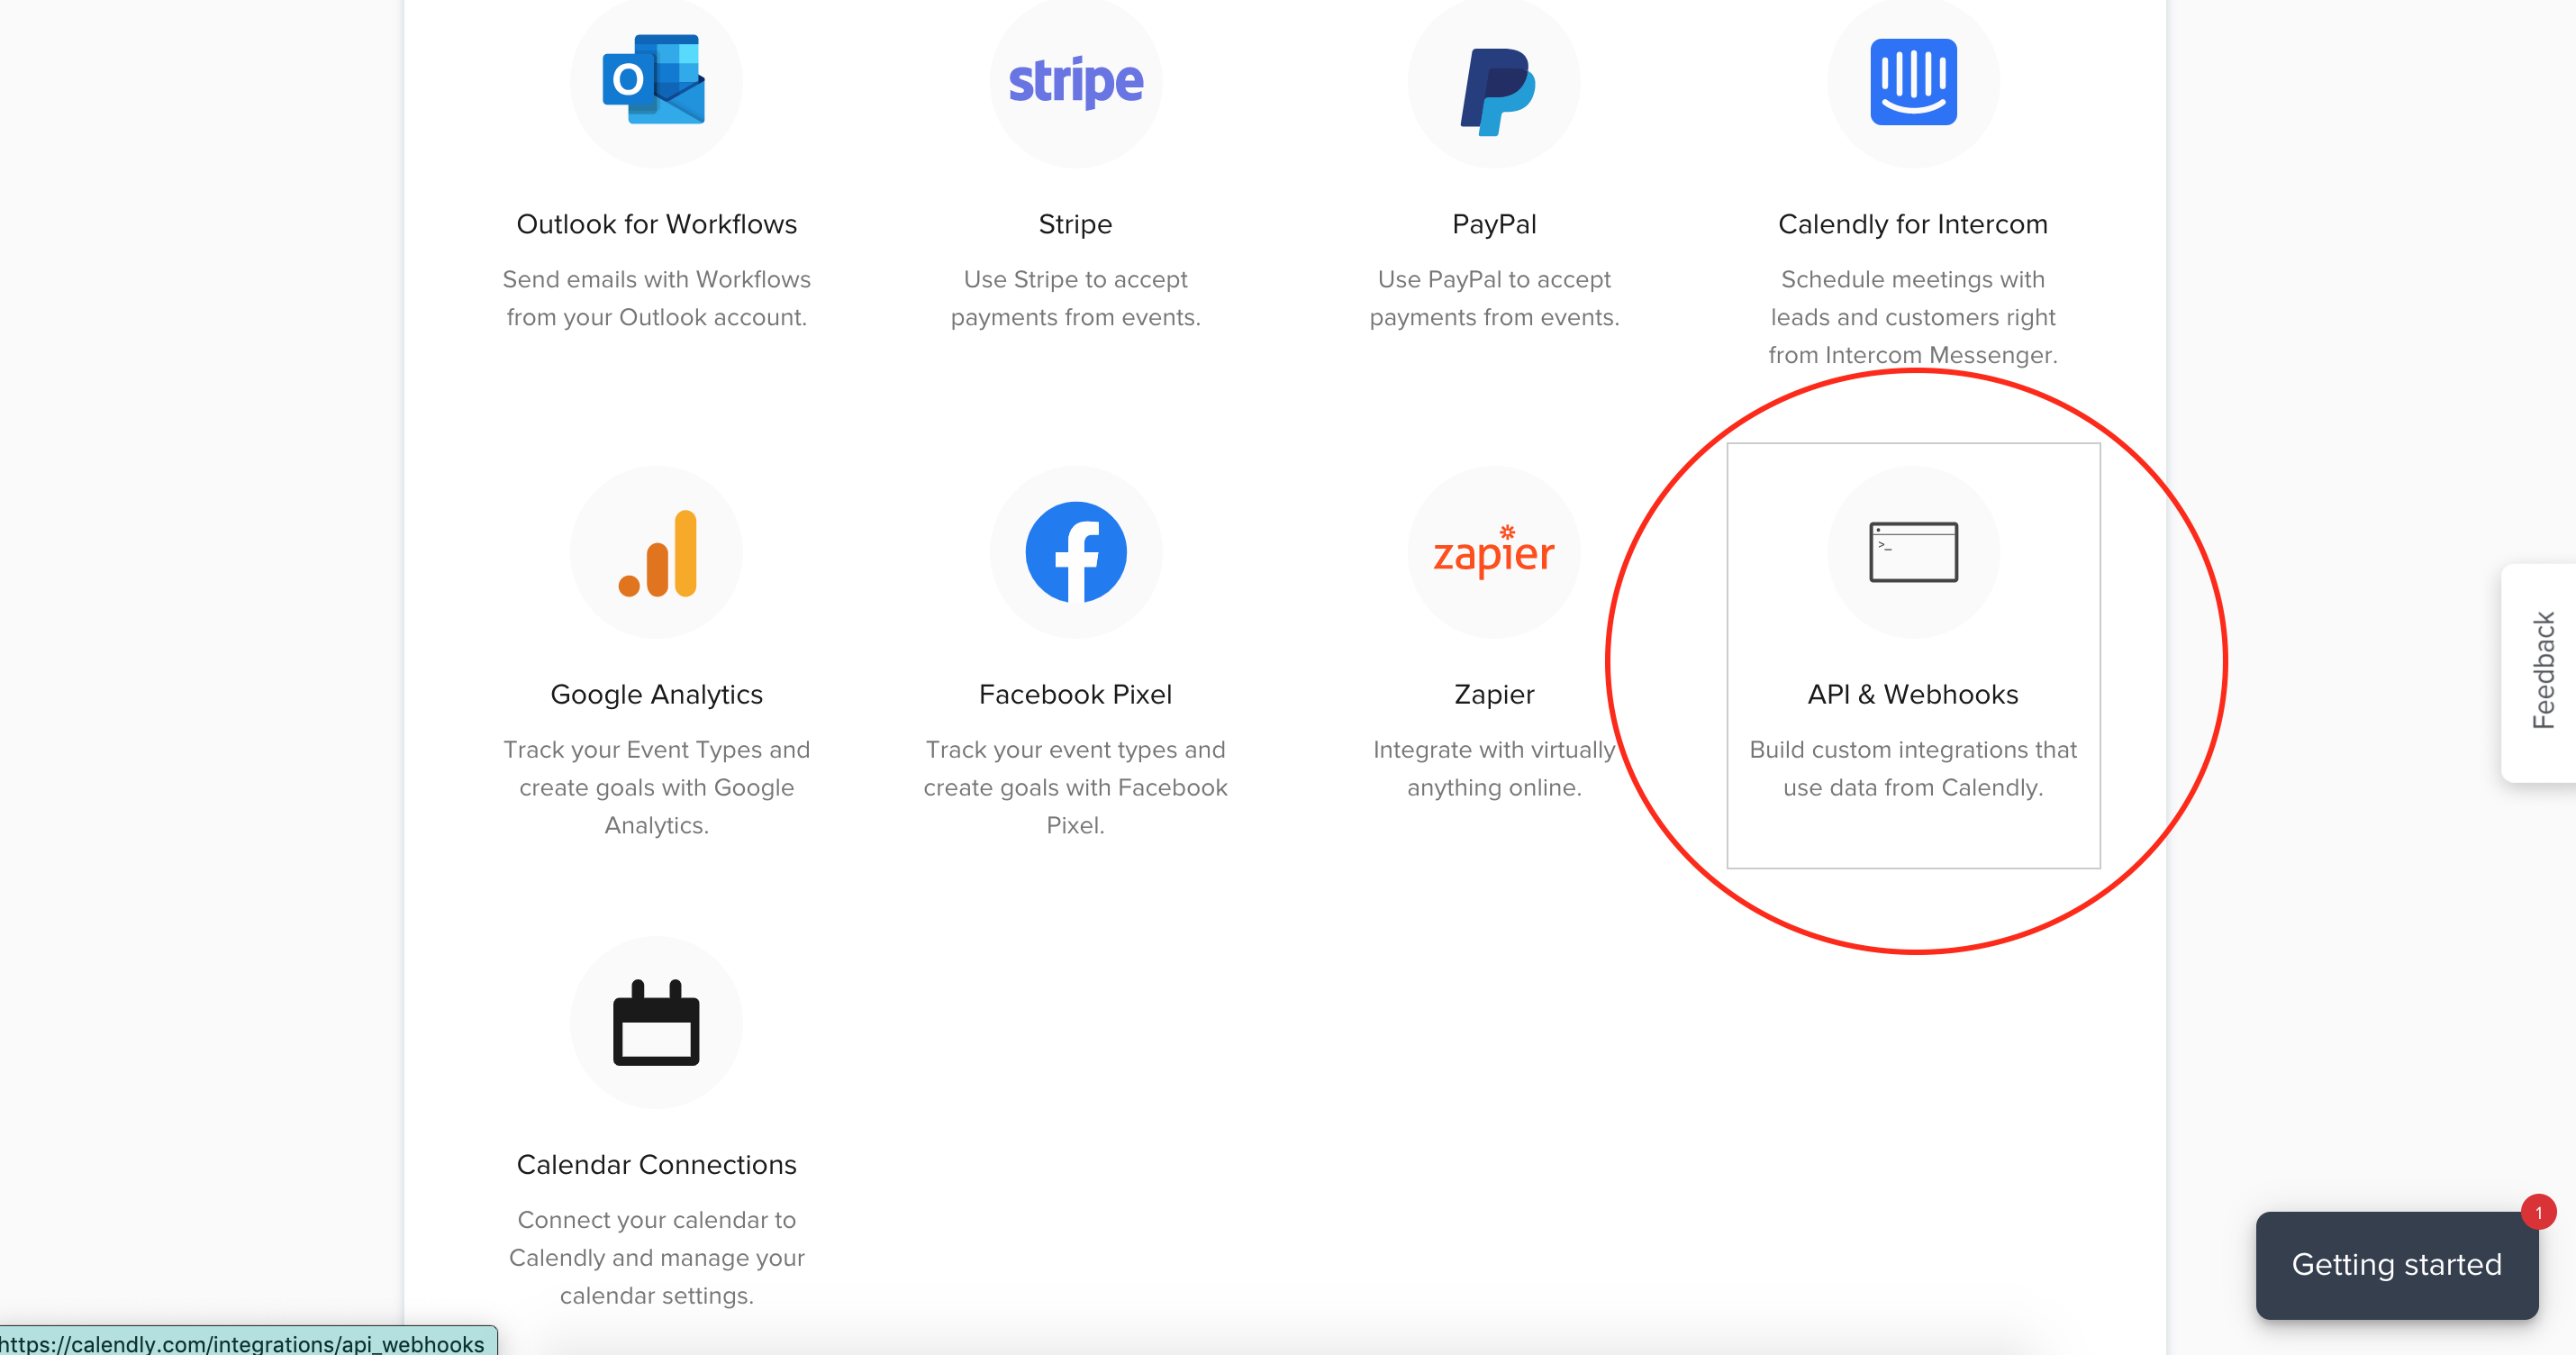
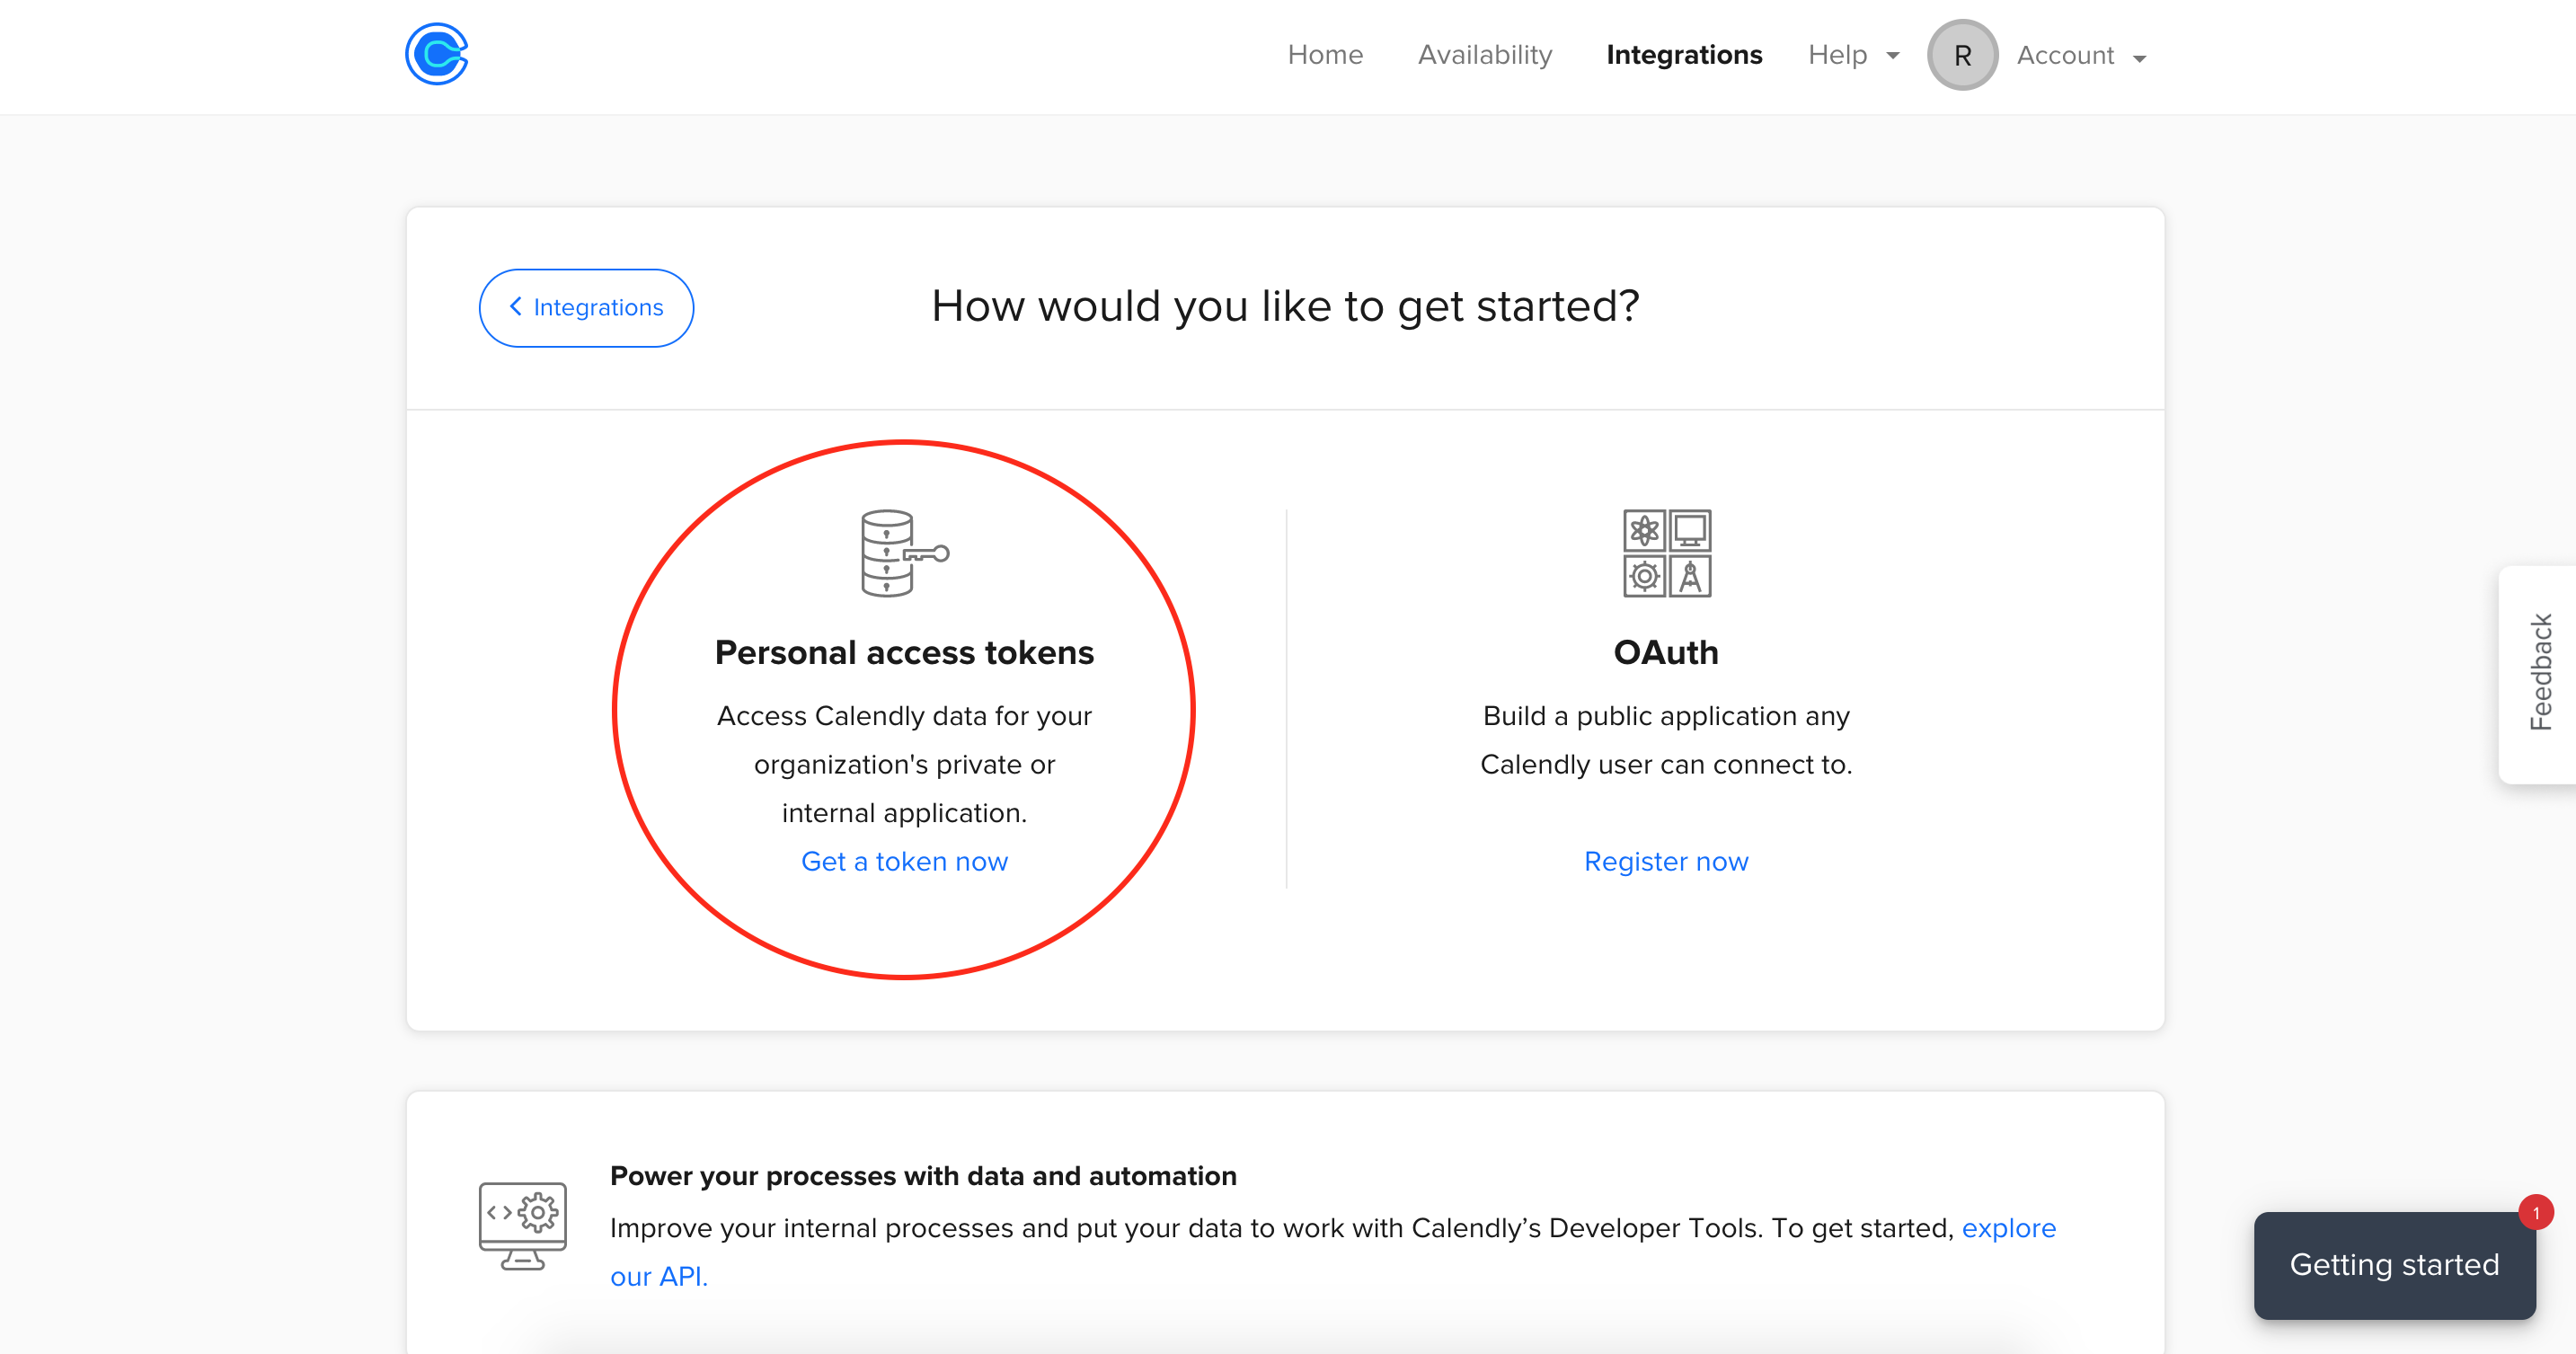
To access your Calendly token, login to your Calendly account from your desktop and click on Integrations at the top of the page. Scroll down until you see API & Webhooks and then choose Personal access tokens.
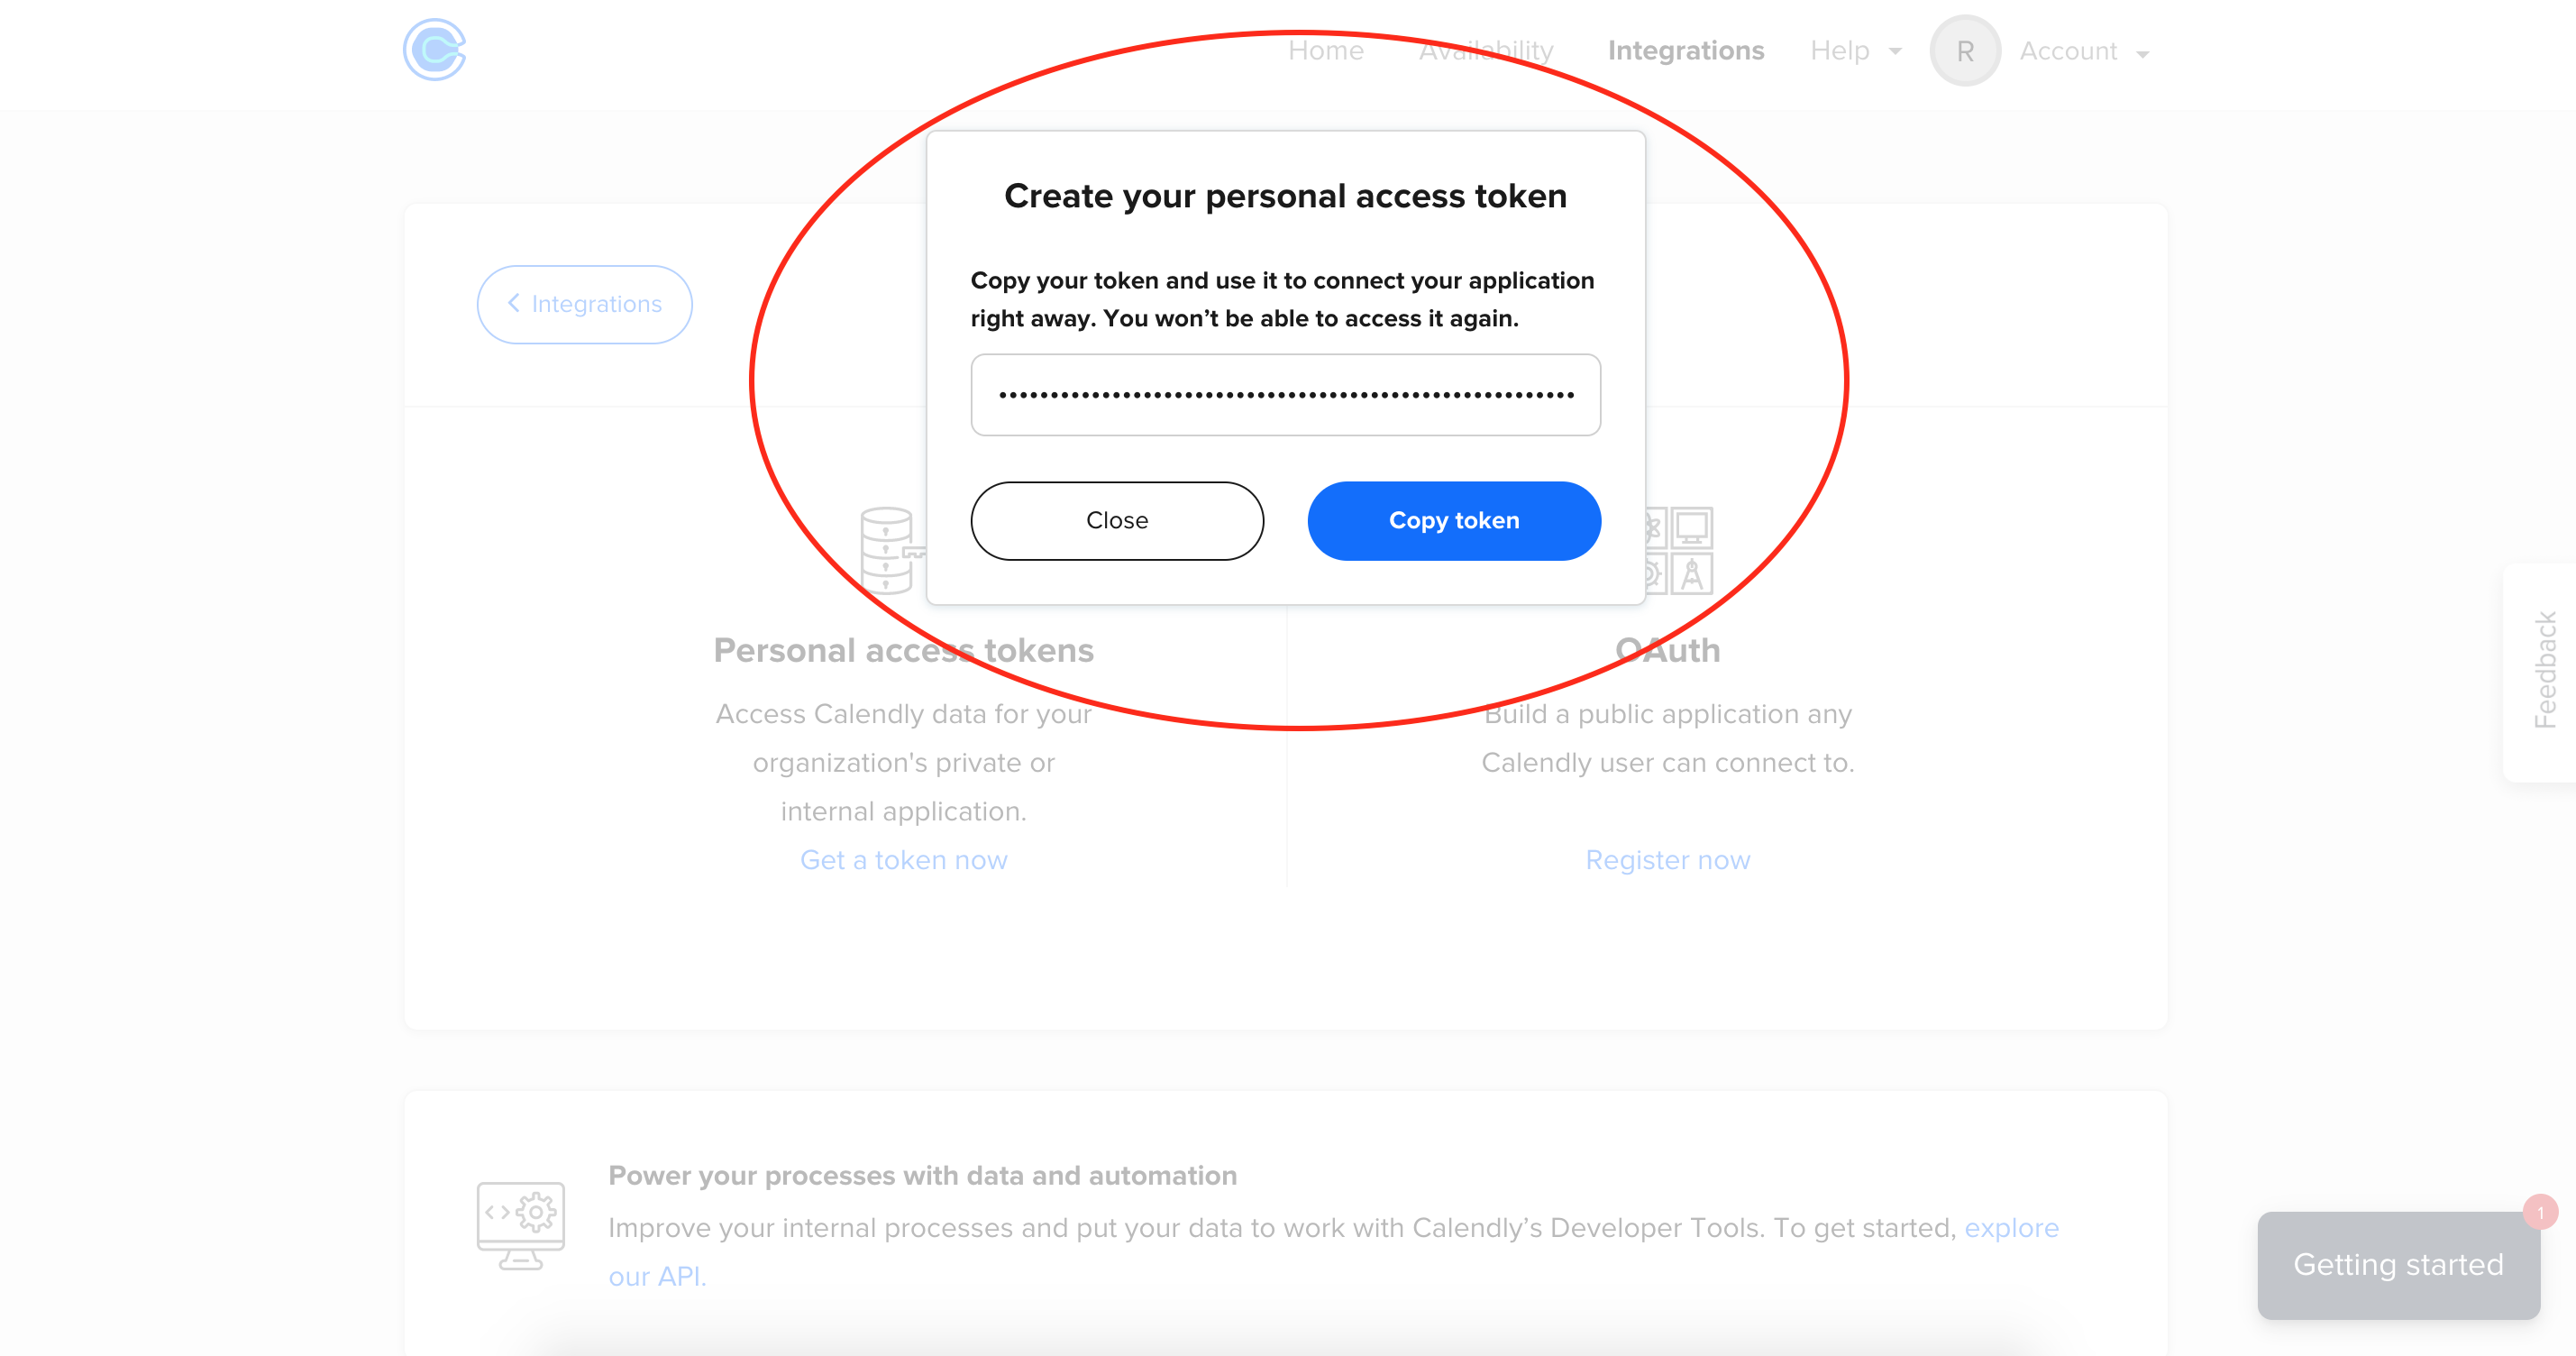
You'll be prompted to name the token (use "Onescreener Page", for example) and then copy it. This is what you will paste into the Calendly token field in your Onescreener Sell a Session window.

After you've hit Verify, you'll see that you can now choose Booking events directly from your Calendly account.
Hit Save, and your new session link will appear on your Onescreener site.


When a customer clicks on the link and pays for a session, they'll receive an email that includes direction to this event in Calendly.