The Facebook pixel is a small piece of code that goes on your Onescreener/website. With the pixel, you can bring back site visitors, or find new people who will likely be interested in your personal brand.
The pixel allows you to see who is visiting your Onescreener, what they watch or listen to, and how they navigate around your page. These actions are followed by Facebook, and let you create targeted ads for specific demographics on the Facebook, Instagram and Messenger platforms. Basically, it's a great way to boost your business and gain more visibility by becoming more aware of your audience.
NOTE: In accordance with website privacy policies, we strongly suggest that you let your audience know that you are collecting their data. You can do this by simply writing "This site uses Facebook Pixel to track your data in order to improve customer experience" in the About section of your Onescreener site.
Firstly, create a Facebook pixel (if you already have one, skip to step two)
- Go to Events Manager.
- Click Connect Data Sources and select Web.
- Click Get Started.
- Select Facebook Pixel and click Connect.
- Read how the pixel works, then click Continue.
- Add your Pixel Name.
- Enter your website URL to check for easy setup options.
- Click Continue and follow the instructions.
For more detailed information on this process, go directly to Facebook for Business.
Secondly, find and copy your Facebook pixel ID number
- Log in to Facebook and go to your Ads Manager account.
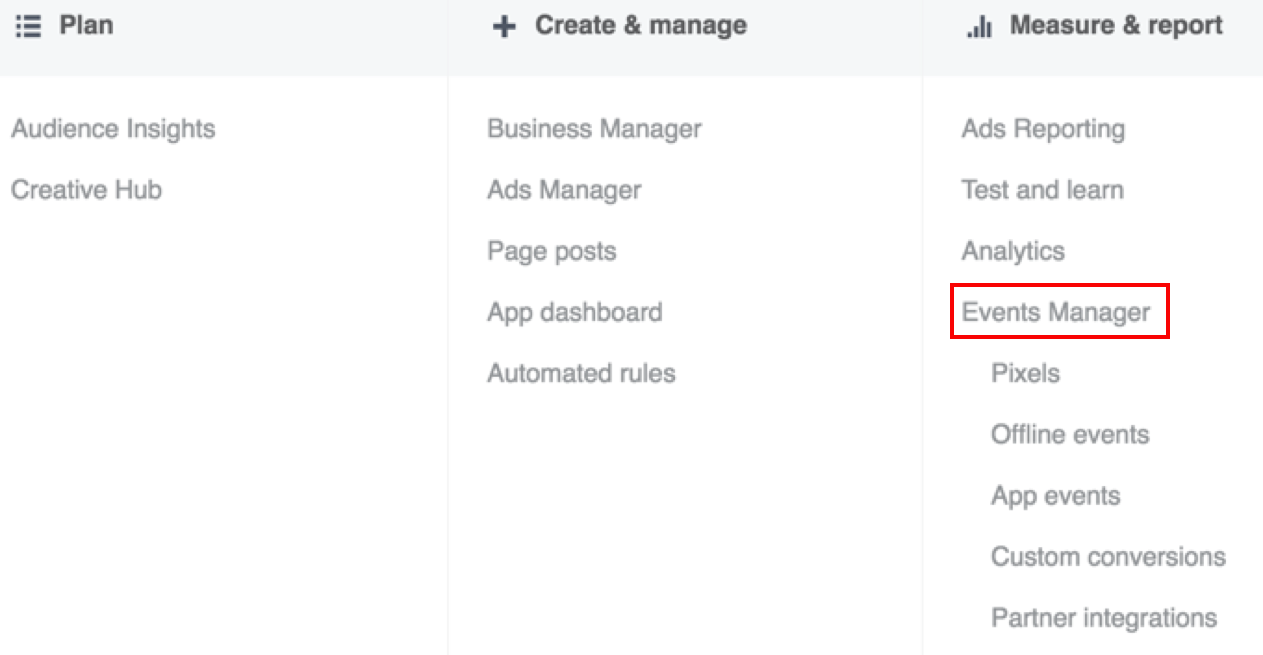
- Open the Navigation Bar and select Events Manager.

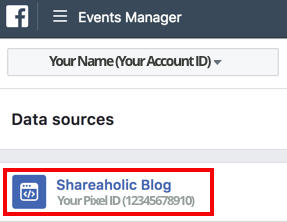
3. Copy your Pixel ID from underneath your Site Name.

Then, paste the pixel ID number into your Onescreener PREMIUM settings
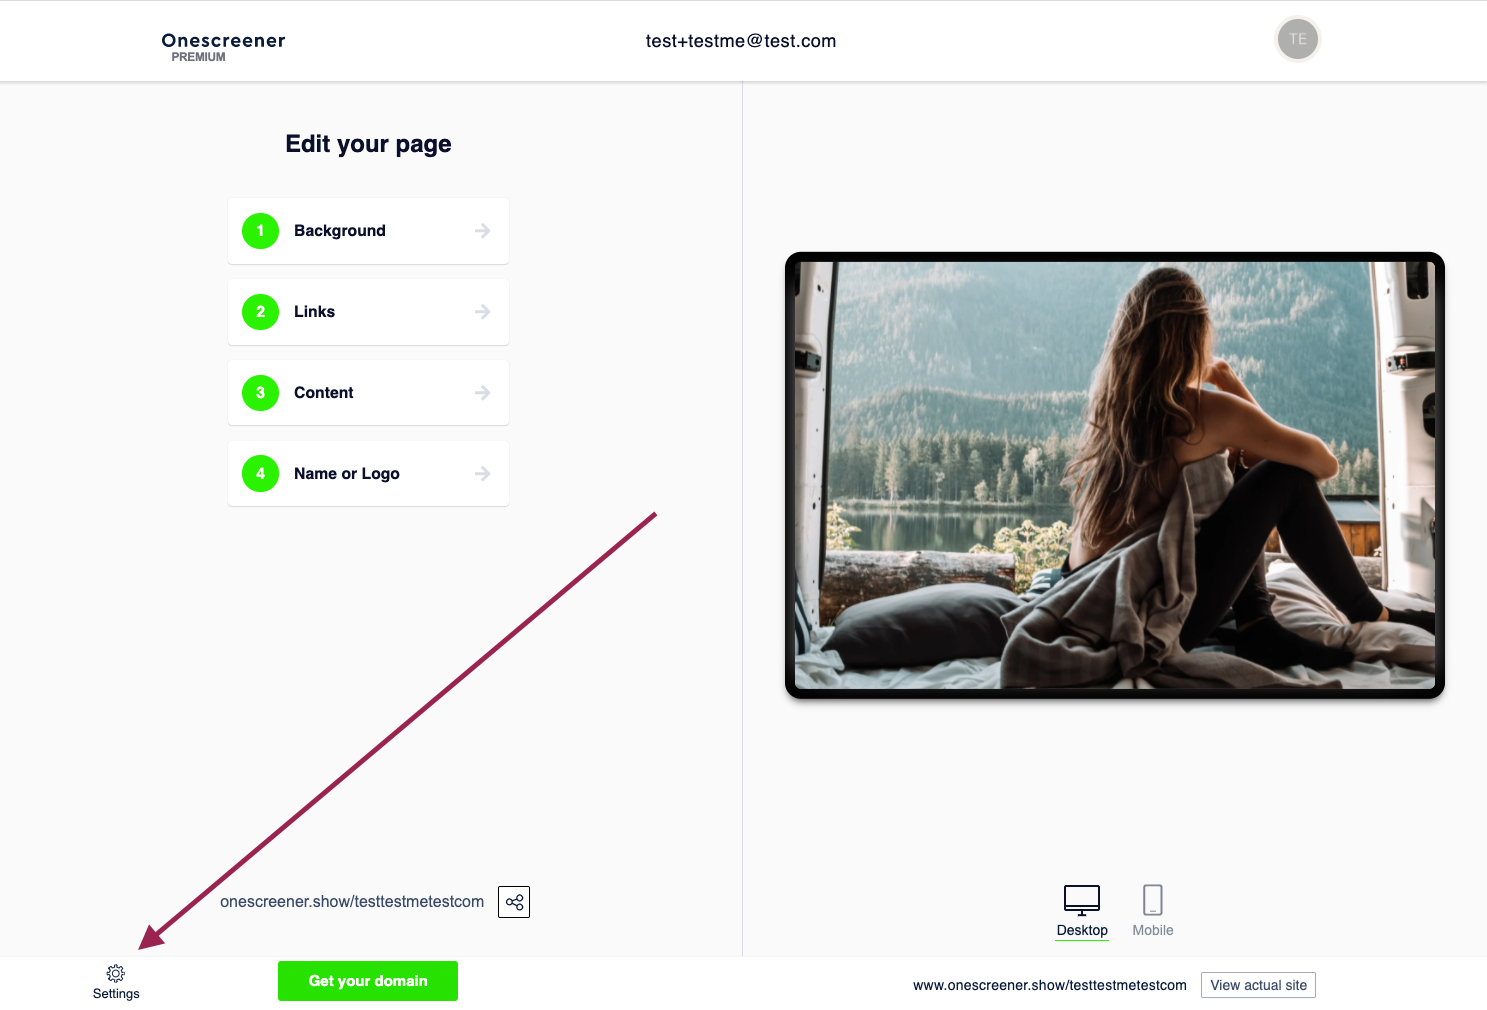
1. In your Onescreener account, click on Settings to access your Settings Page.

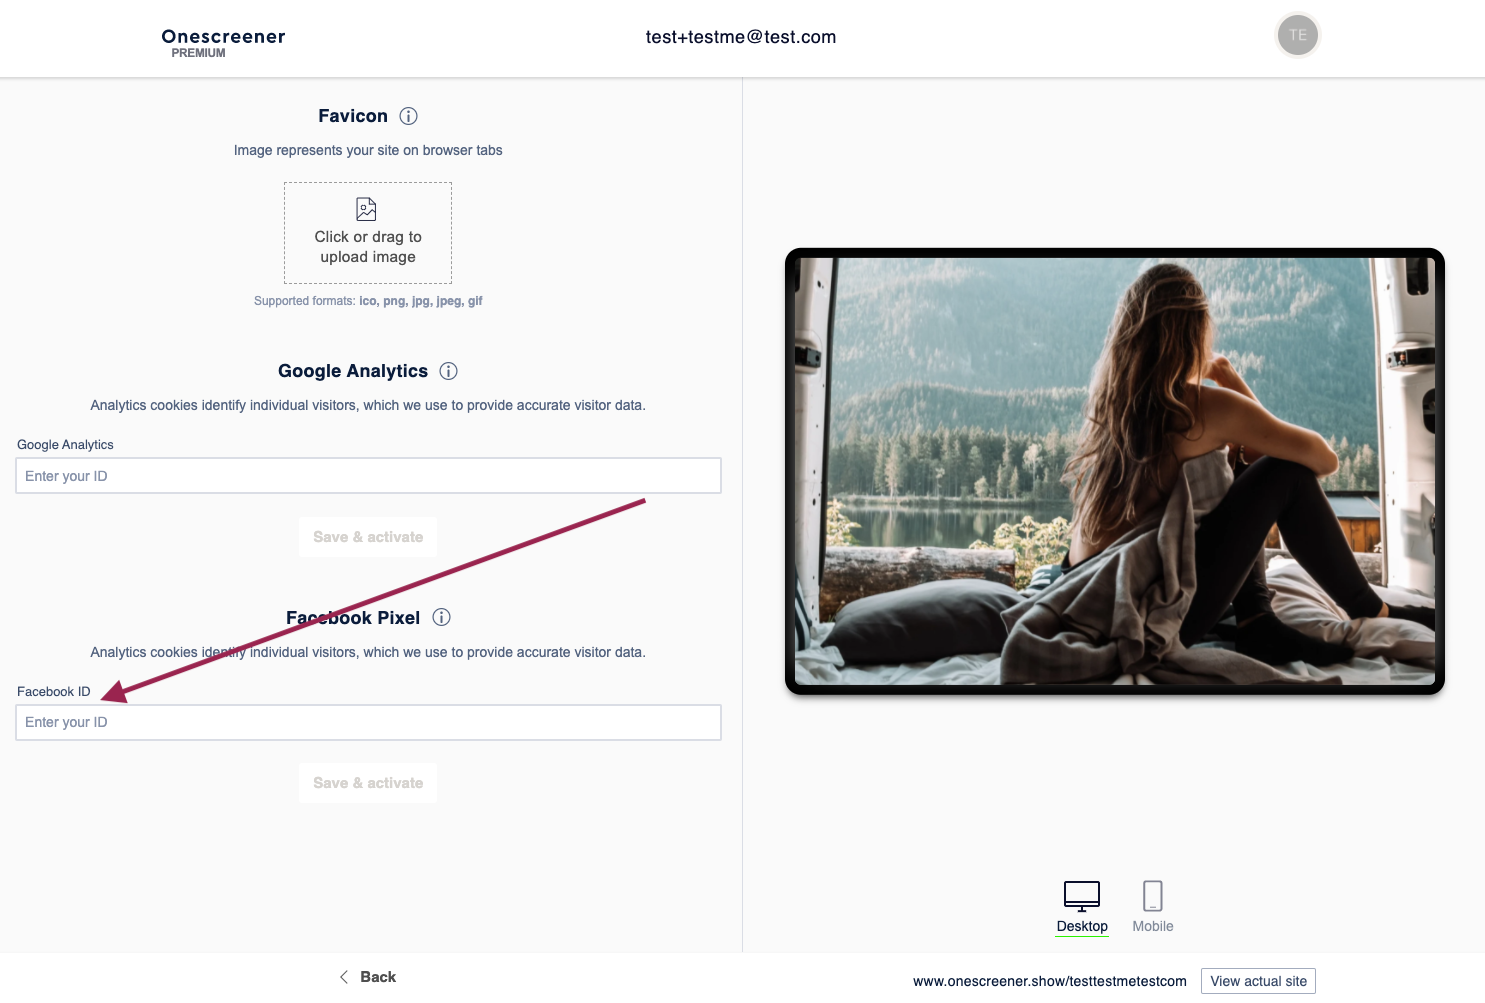
2. Paste the pixel ID number into the field and click Save & activate.

When you enter your Facebook Ads Manager account, you will now be able to analyze the data from your Onescreener.


