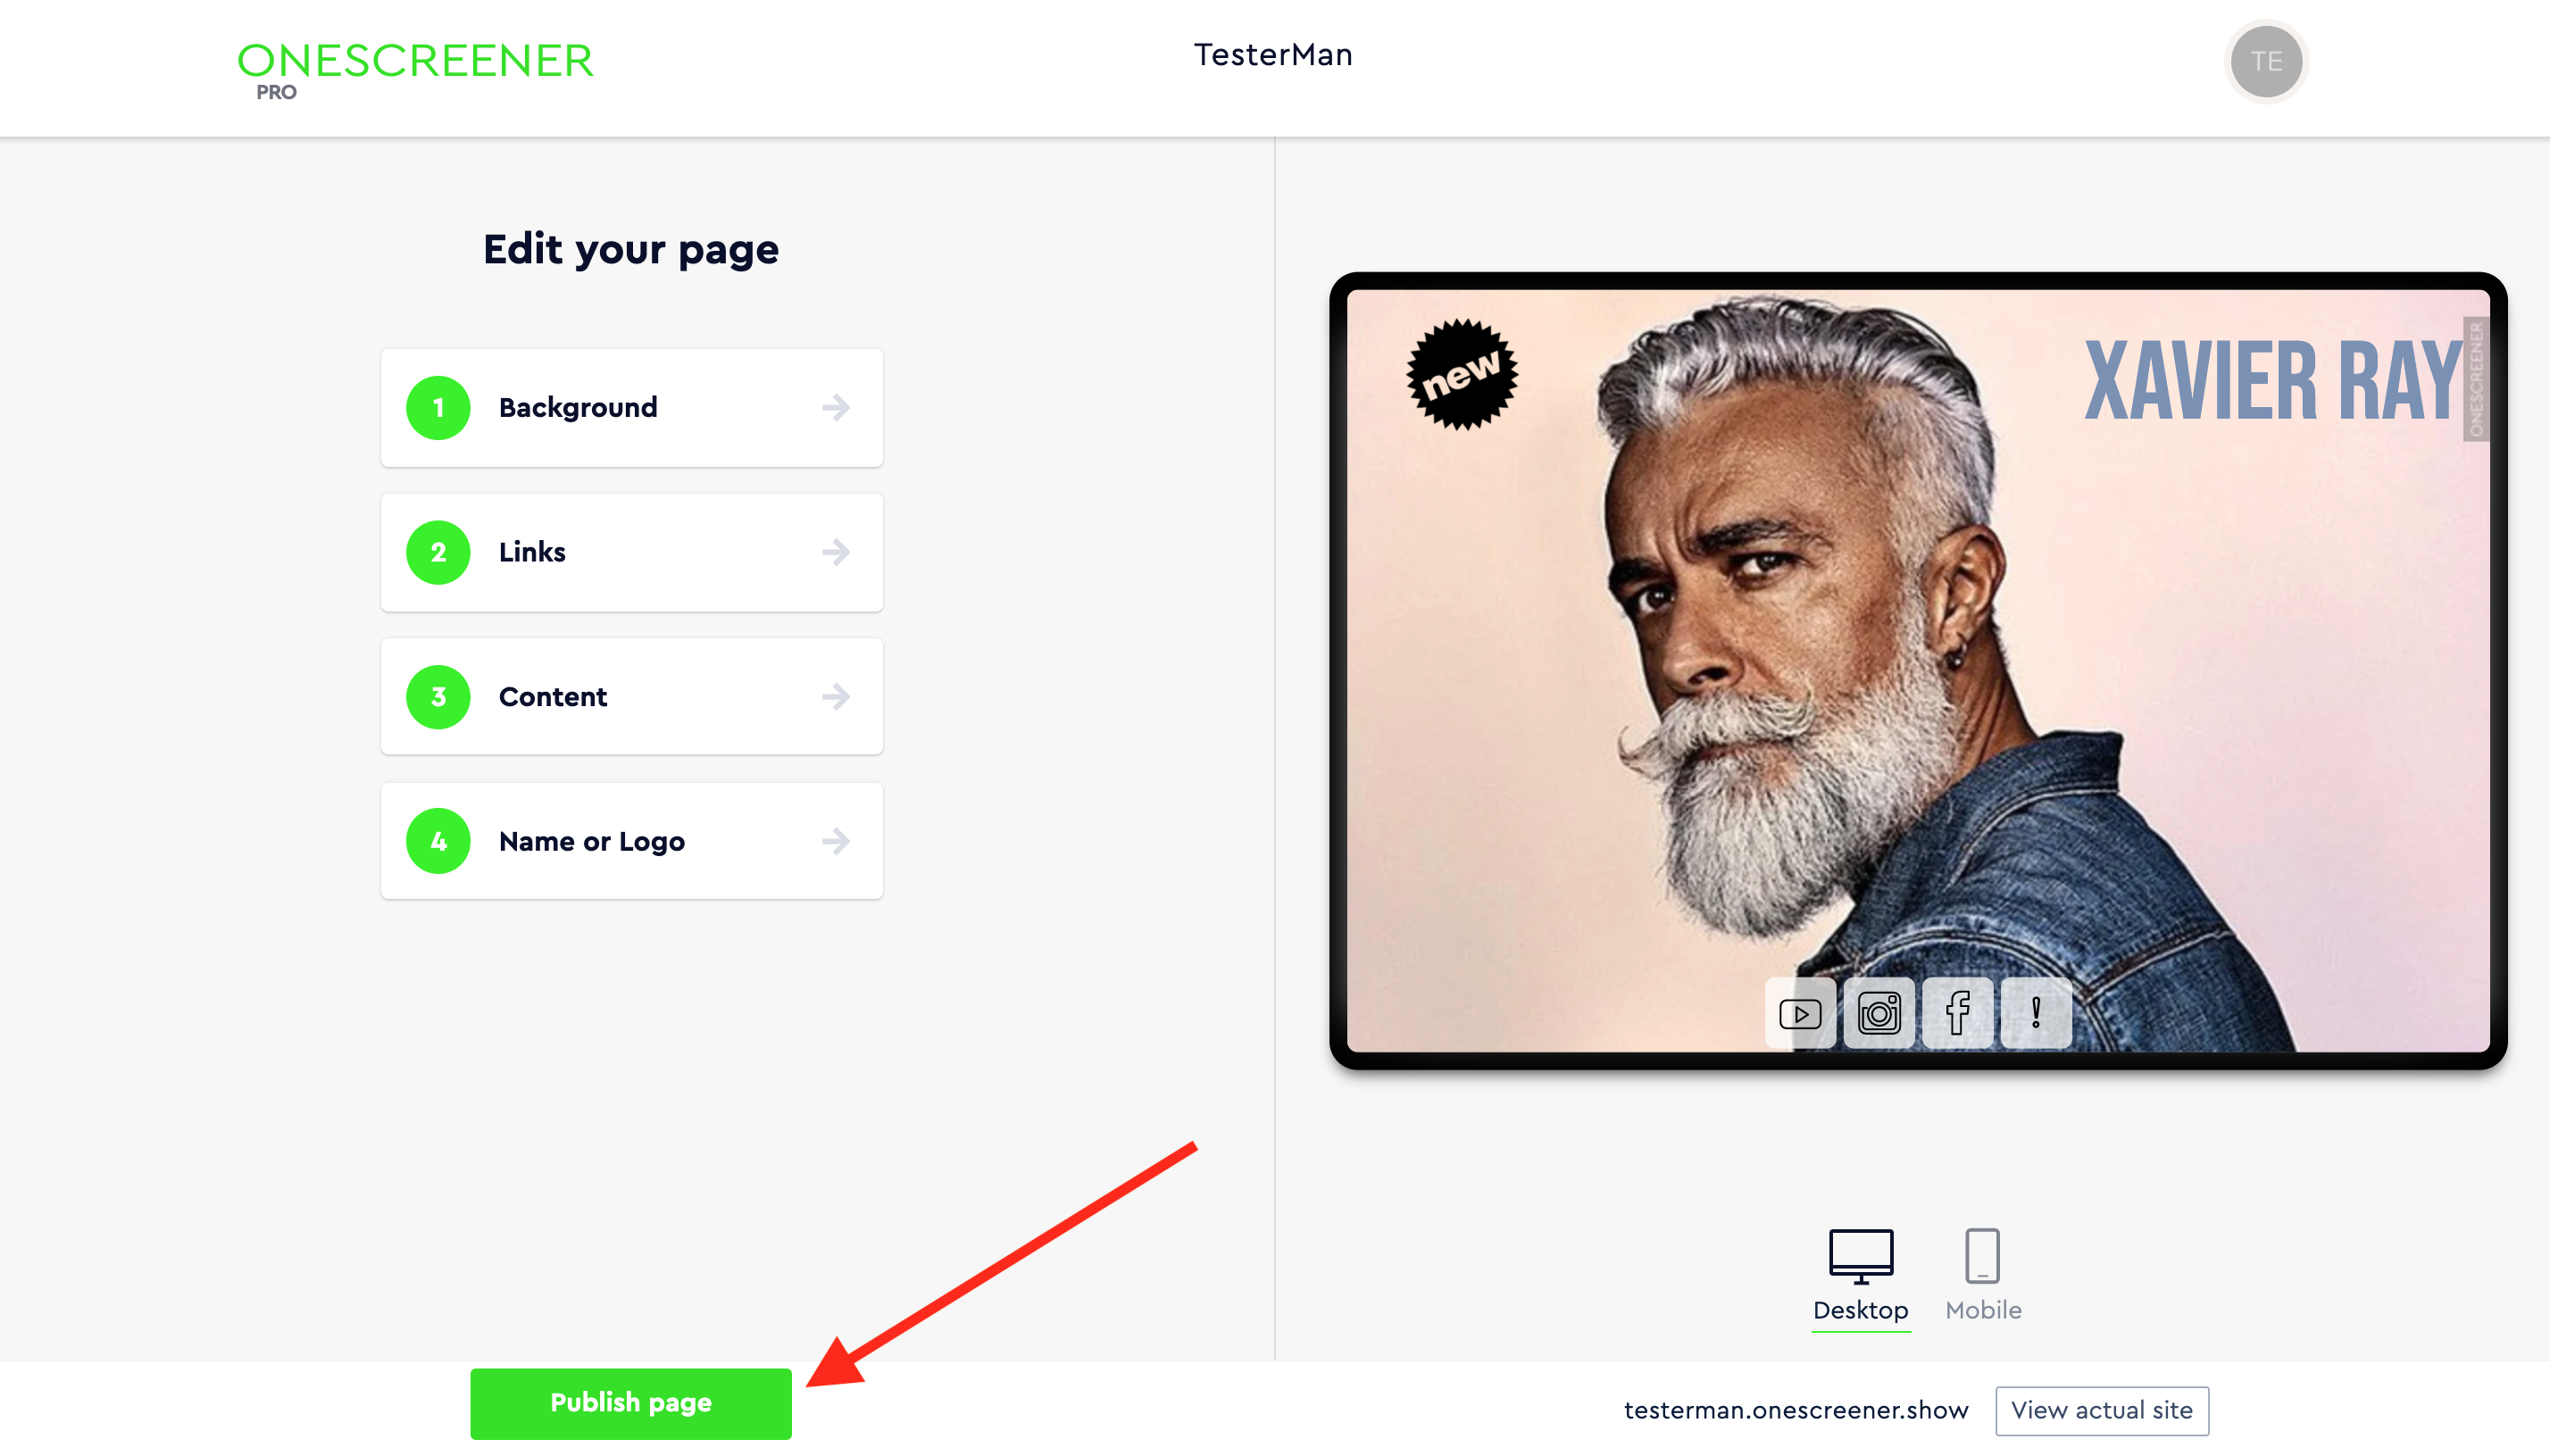
From the main page of your Onescreener account, after you've designed your site, click on Publish page at the bottom of the screen.
At this point, you must upgrade to the Onescreener PREMIUM Plan and choose to Connect existing domain when prompted.
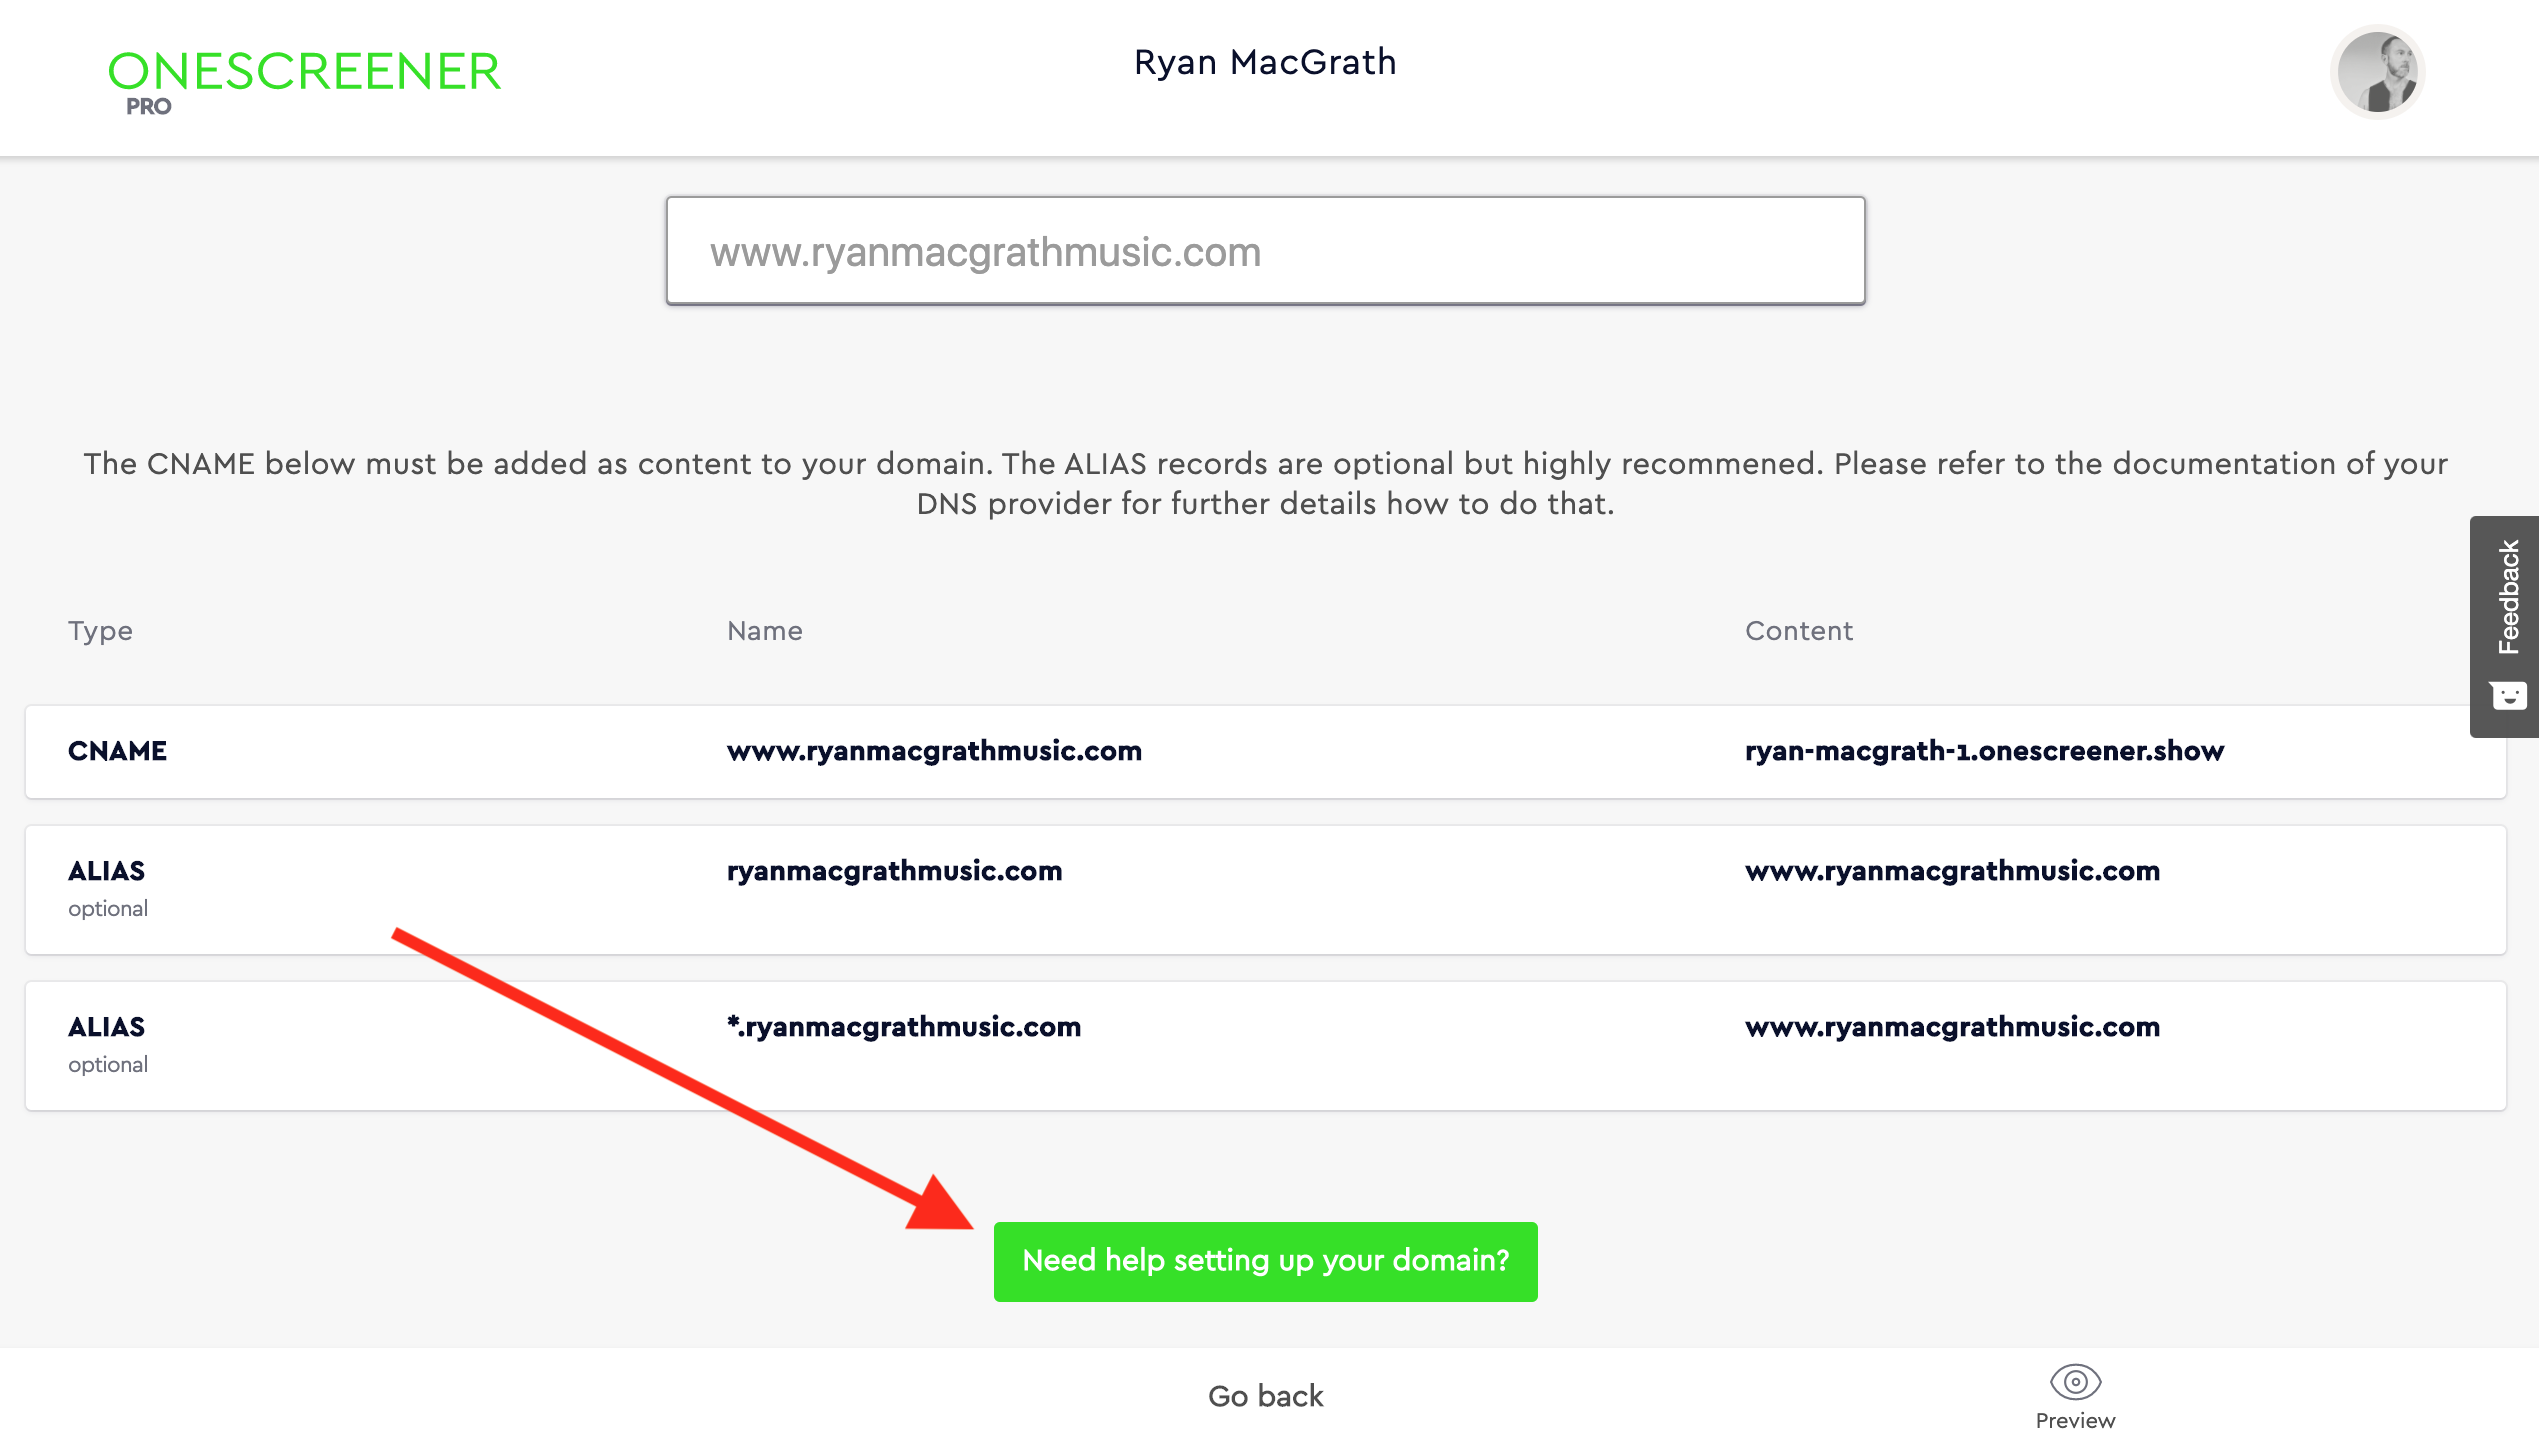
Upon entering your domain name, you will be provided with a series of domain records from Onescreener which you must apply to your Namecheap account.
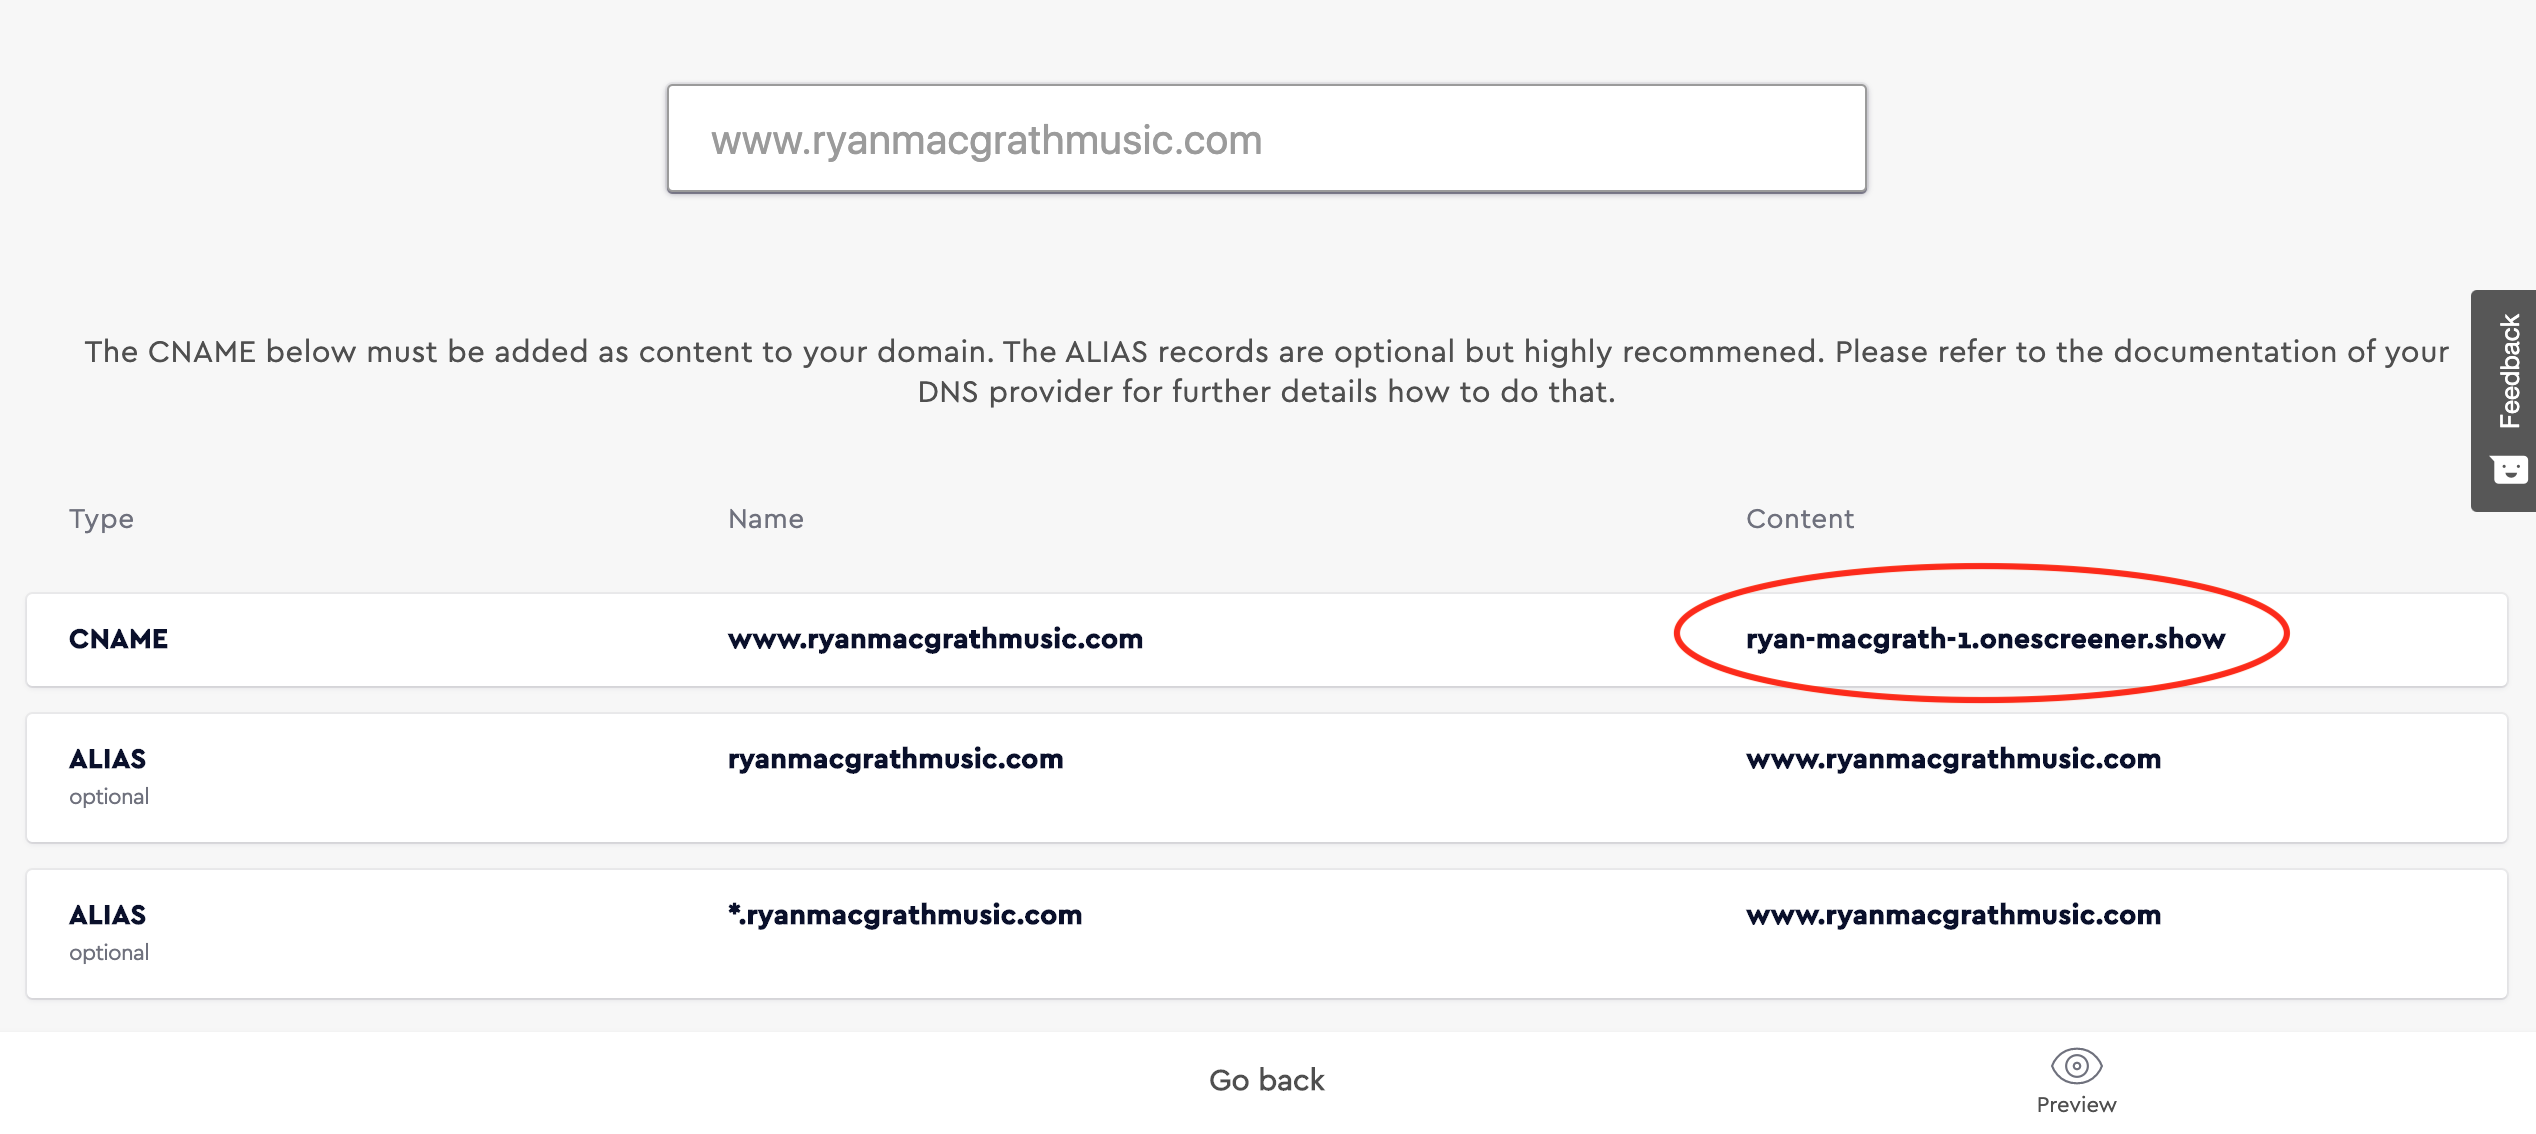
The most important of these is the CNAME. Copy the CONTENT (Value or Target) option to the right, and open your Namecheap Dashboard in a separate browser tab.
Once in your Namecheap account, click on the MANAGE button to the right of the domain you wish to connect. Then go to Advanced DNS.
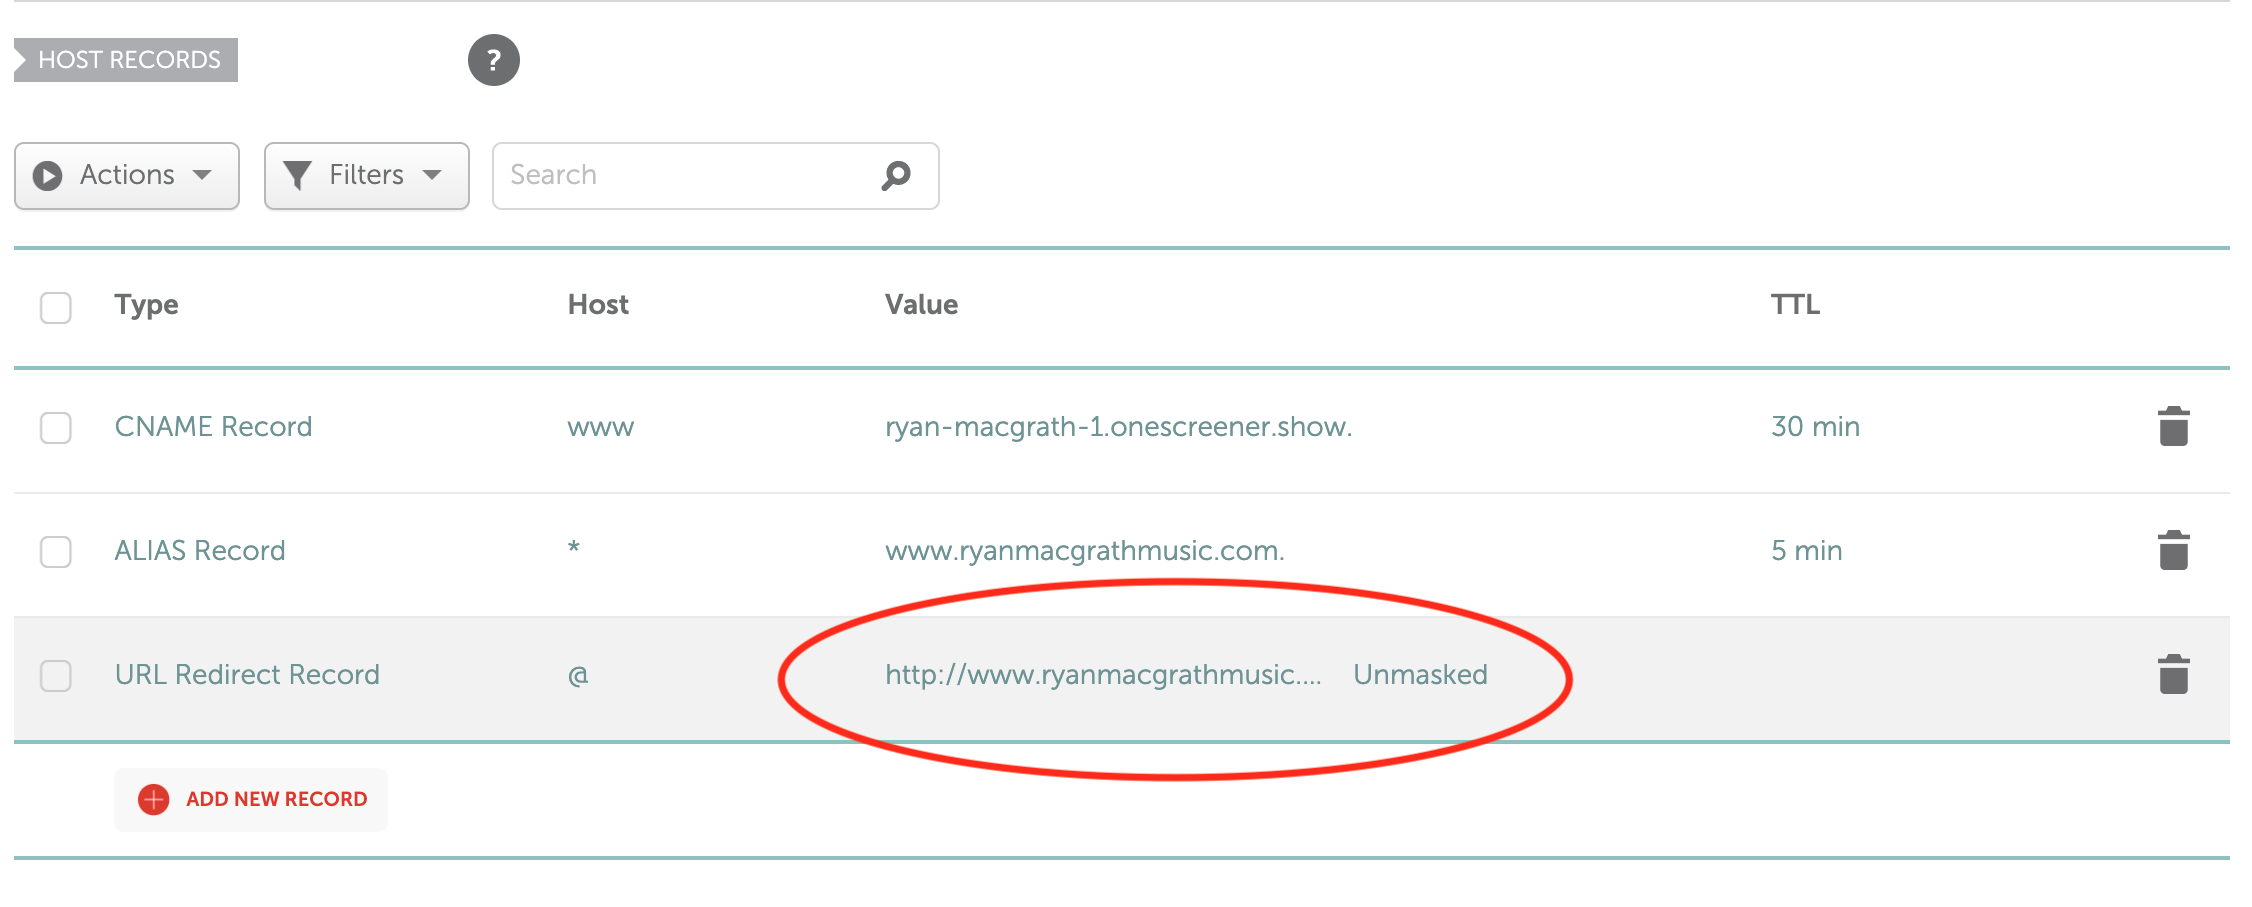
Scroll down slightly to the HOST RECORDS section and click on Type. Choose CNAME Record from the drop down list.
Under the Host column, enter www and then paste the Content address (see image above for example) that you previously copied from your Onescreener domain records. Save what you've entered by clicking on the check mark to the right of the field.
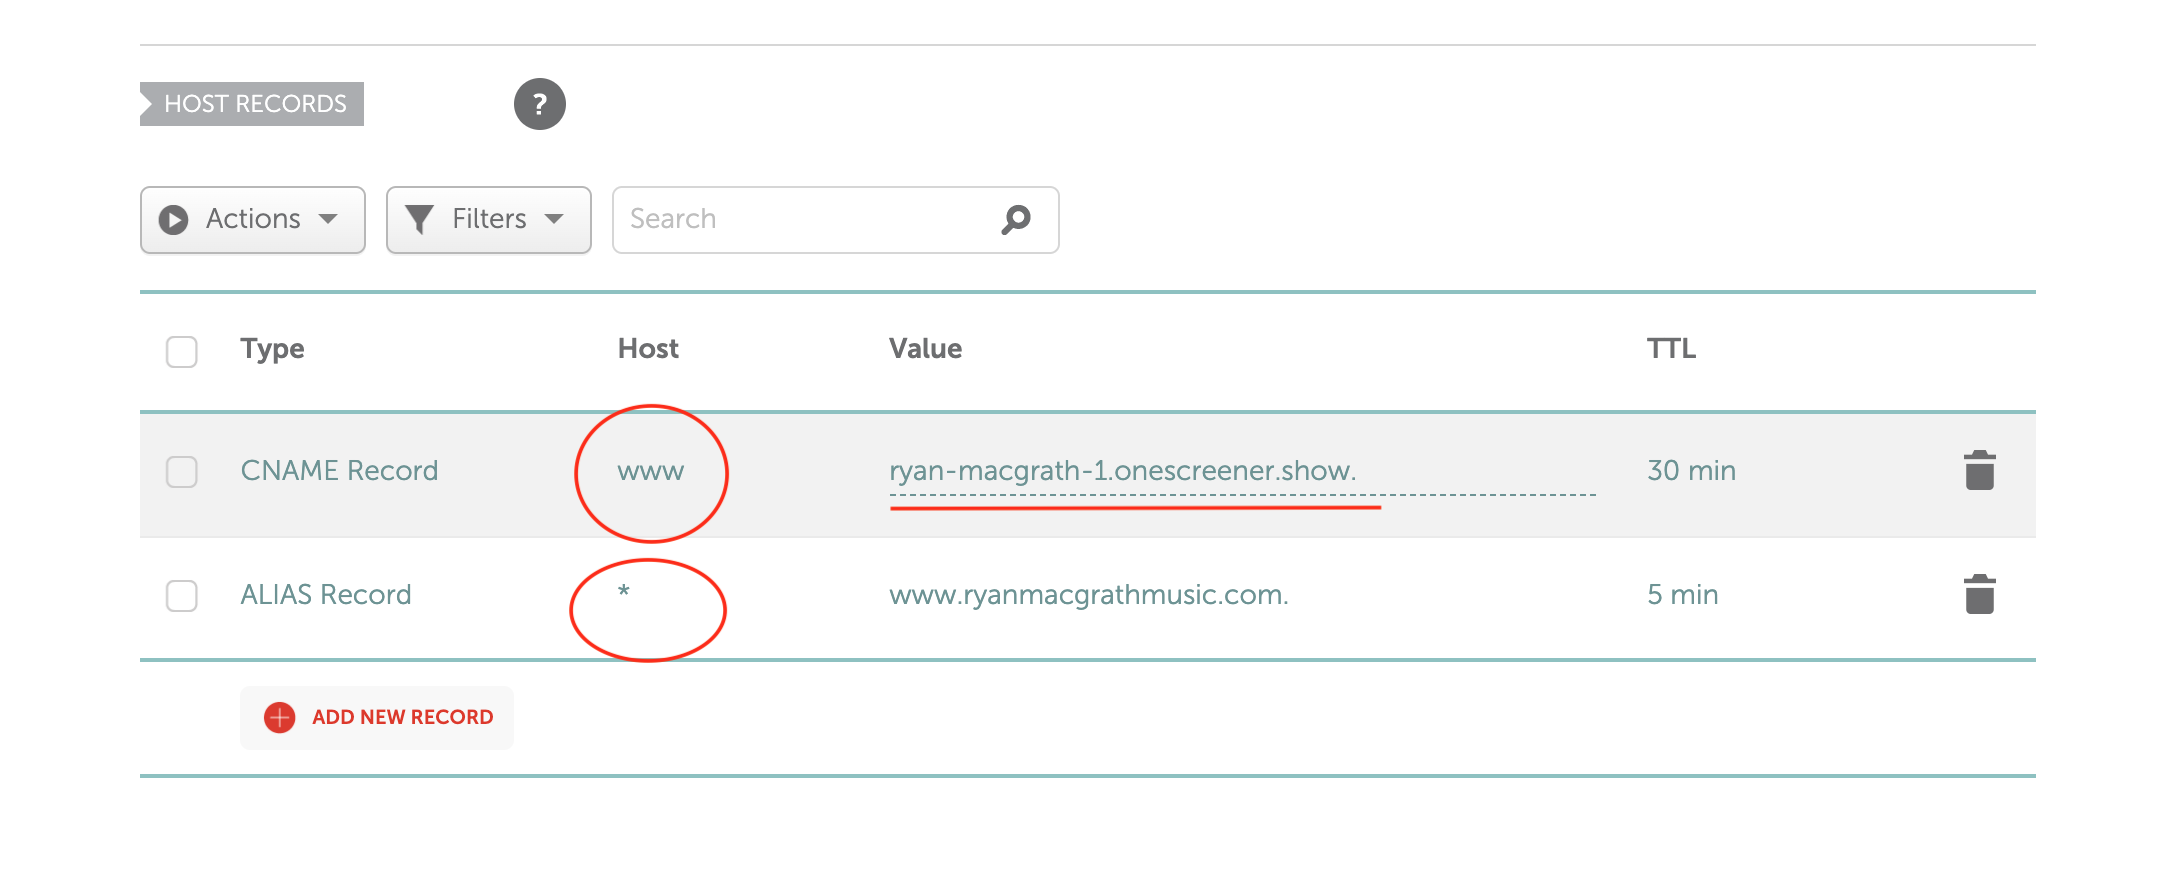
Next, add a NEW RECORD, click on Type once again and choose ALIAS Record from the drop down list. Enter a star * into the Host column.
Return to you Onescreener domain records and copy the Content (Value or Target) address from the ALIAS line.

Go back to your Namecheap Advanced DNS page, and paste the Content address into the ALIAS Record Value line. Again, save it by clicking on the check mark.
Lastly, ADD NEW RECORD a third time, click on Type and choose URL Redirect Record. Enter the @ symbol into the Host column and type in your full web address including http:// into the Value line. Leave the address marked as Unmasked and save it.
Now if you type your domain name into a new browser, you should see that it brings up your Onescreener page.
NOTE: Sometimes it takes minutes or hours for the servers to connect. Please refresh your browser and check again if it's not working. Otherwise, visit the Need help setting up your domain? button in your Onescreener domain settings.
